RC Wallet User Handbook
- 1. Create RC Wallet
- 2. Card Application
- 3. How to Pay the Card Issuance Fee
- 4. How to Activate Your Card
- 5. How to Deposit to Your Card
Step 1: Creating Your RC Wallet
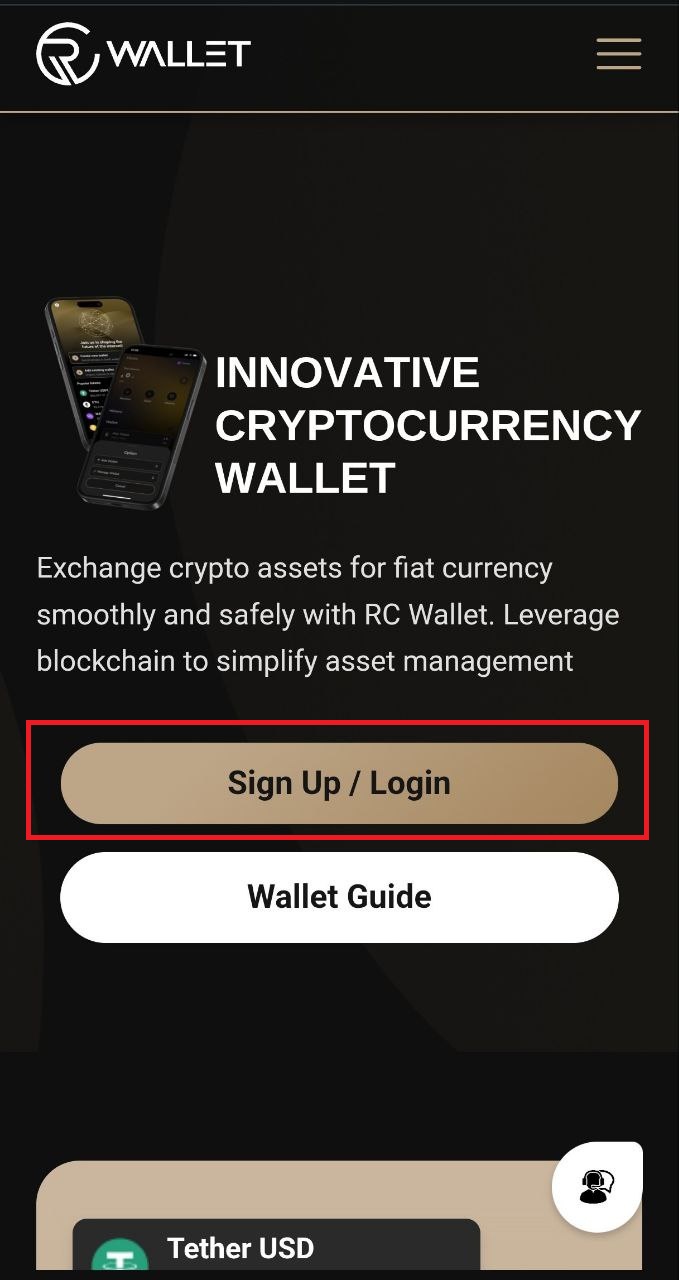
Visit the official RC Wallet website at https://rc-wallet.io/ and tap “Sign Up / LogIn”.
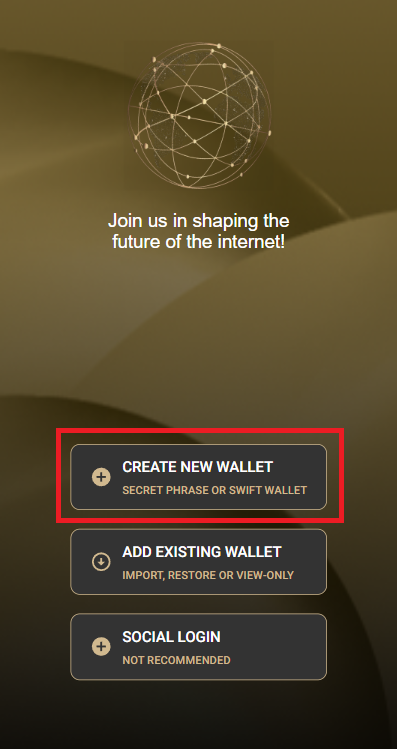
1)Select “CREATE NEW WALLET.”
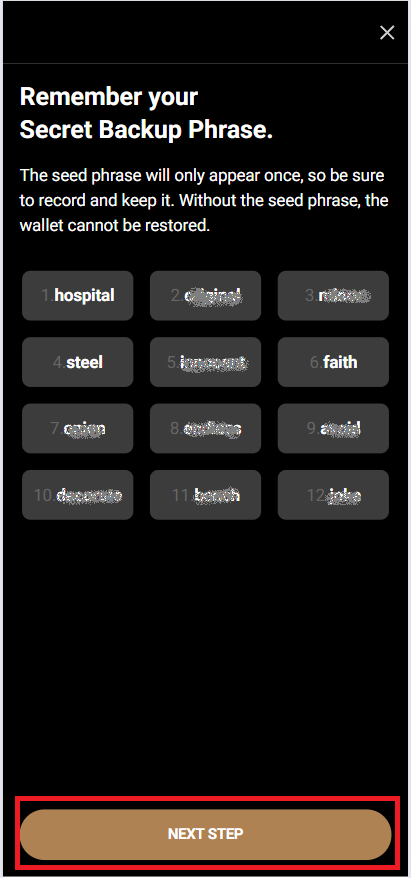
2)Store your mnemonic
You will see a 12‑word mnemonic (secret phrase). Write it down or store it in a secure place—this phrase is the only way to access or restore your wallet. Do not share it with anyone.
After you’ve securely saved the mnemonic, tap “NEXT STEP.”
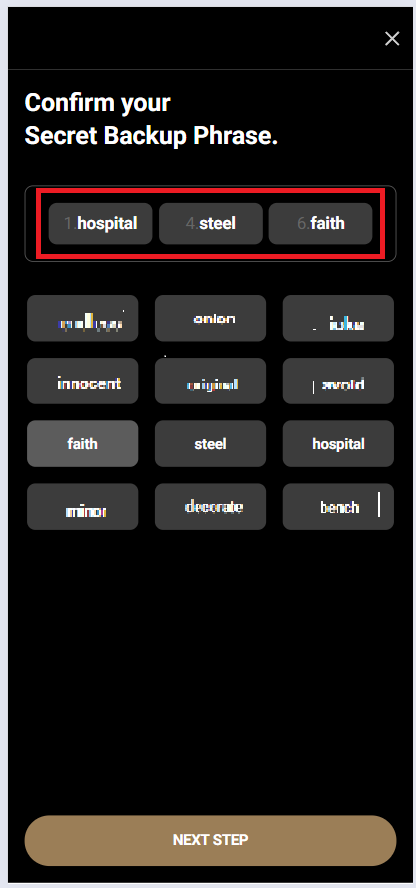
3)Mnemonic confirmation
On the confirmation screen, select the same words in the correct order as shown, then tap “NEXT STEP.”
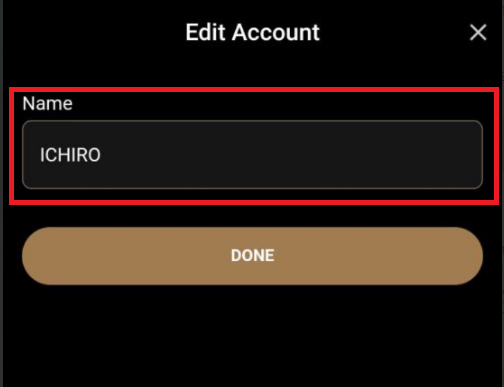
4)Enter the wallet name
Enter a Wallet Name using alphanumeric characters (special characters are allowed) and tap “NEXT STEP.” (You can rename your wallet at any time.)
Your RC Wallet is now successfully created!
Step 2: Card Application
2.1 Open or Log In to RC Wallet
Launch the RC Wallet app or visit the website and sign in.
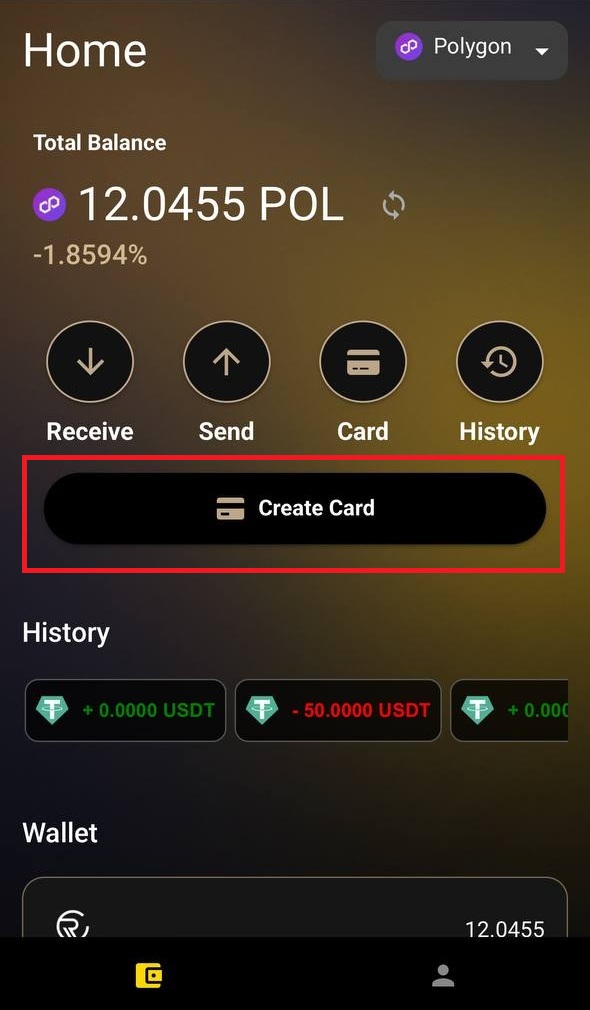
2.2 Create Card
Tap “Create a Card” on the home screen.
6 Steps to Apply for Your Card
Step 1: Enter Basic Information
Provide your full name, date of birth, and any referral code you have.
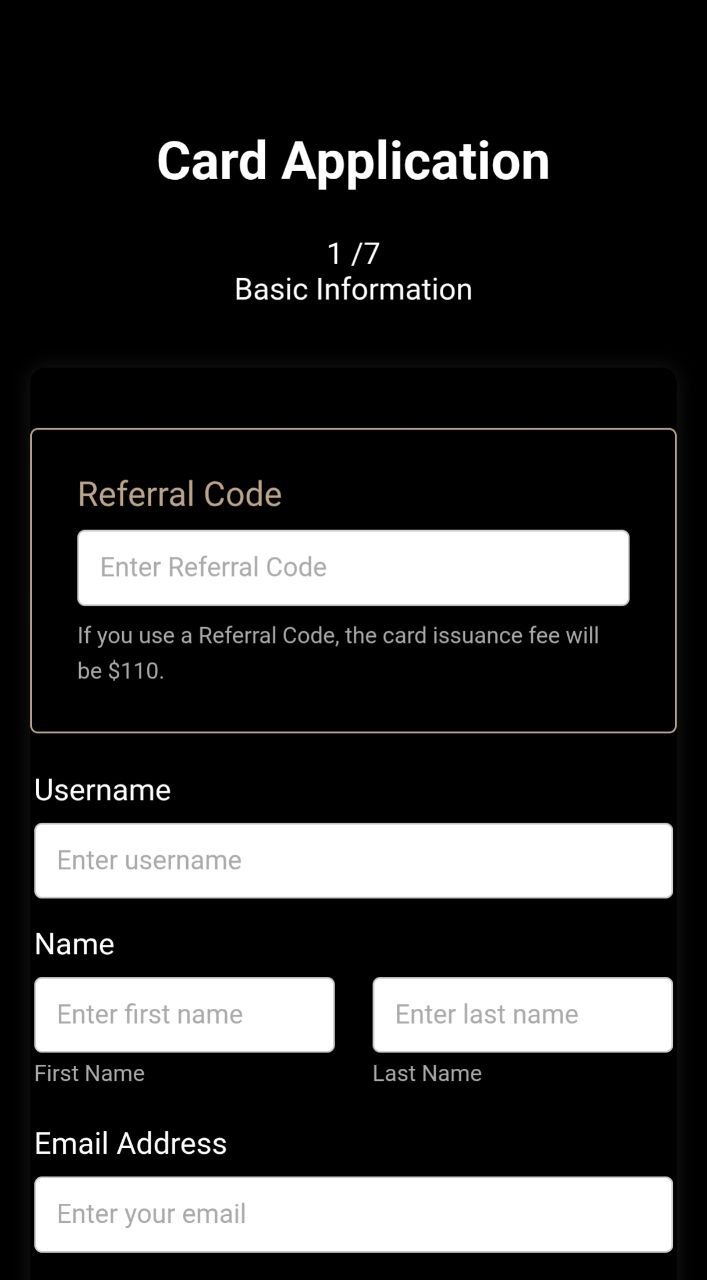
Use the calendar picker to select your birth date and ID expiration date.

Step 2: Register Address & Upload Proof
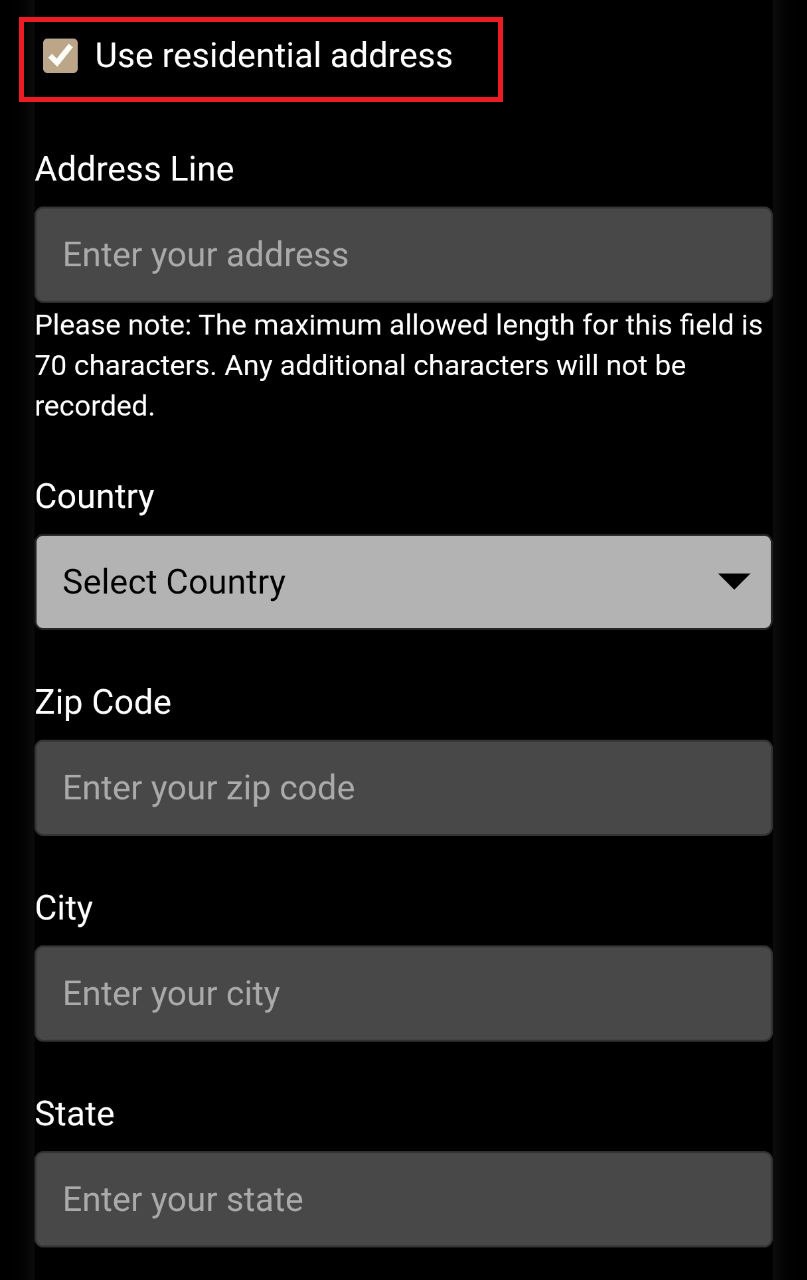
Enter your residential address.
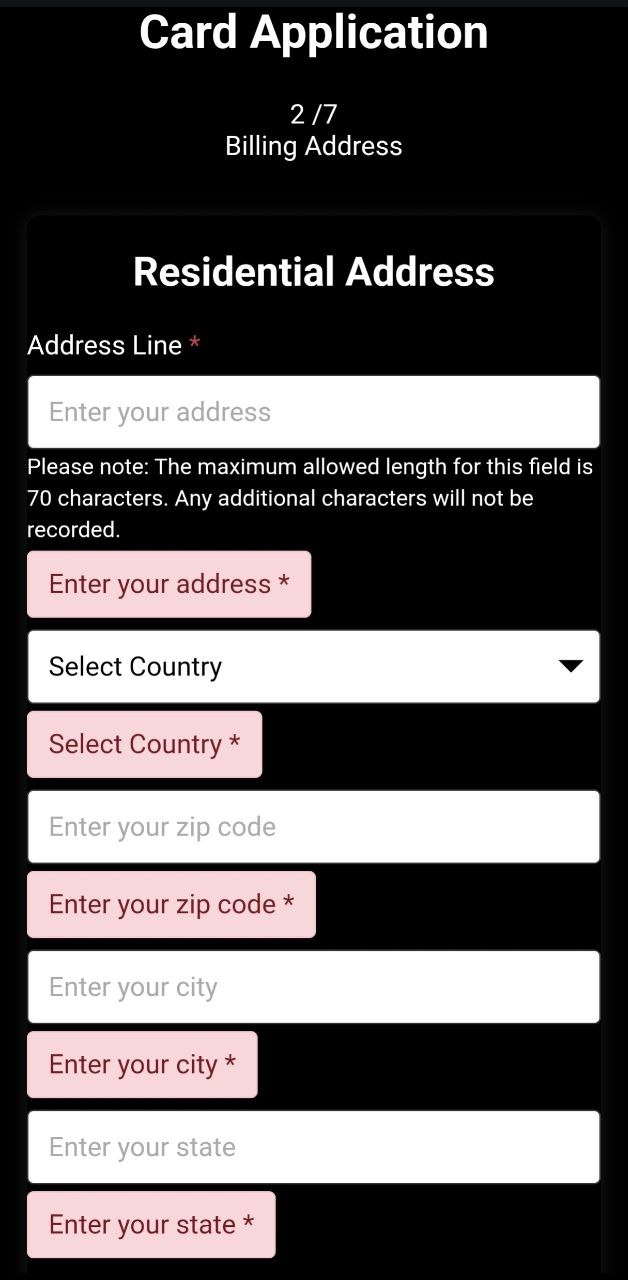
If your billing address is the same, check the box to copy it automatically.
To ship to a different address, enter that in the billing address field.
Upload a proof-of-address document dated within the last three months, such as:
- Utility bill (electricity, water, gas)
- Bank statement or card statement
- Tax notice or official government letter
- Rental agreement or rent receipt
- Resident registration certificate

Step 3: Confirm Delivery Address & Agree to Terms
Review your basic information and confirm the delivery address.
Check the boxes to agree to the Rays Capital and MatchMove Terms of Service and Privacy Policy.

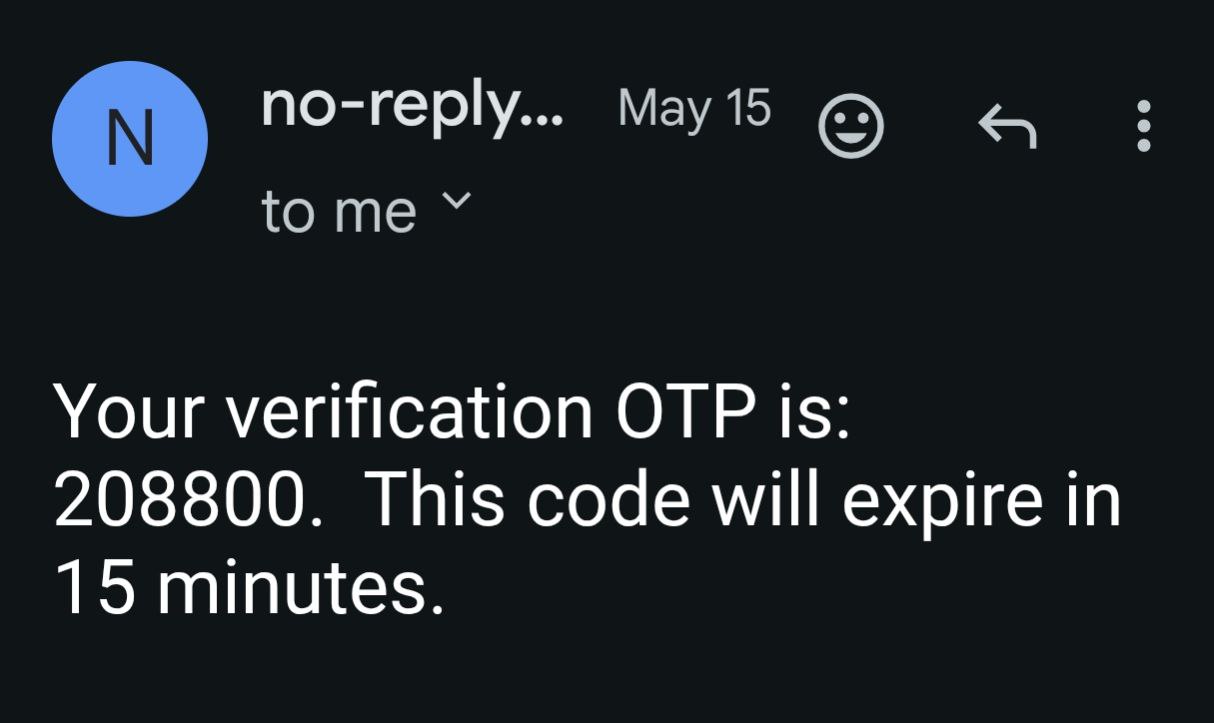
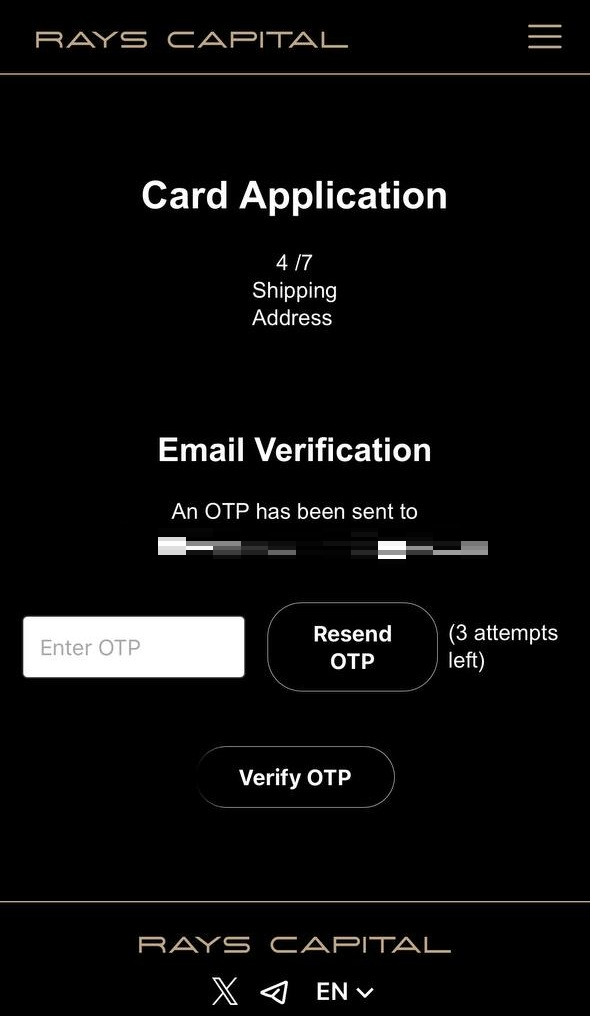
Step 4: Verify Email Address
Tap “Send OTP” to receive a one‑time password by email.
Enter the OTP you receive
and tap “Verify OTP.”
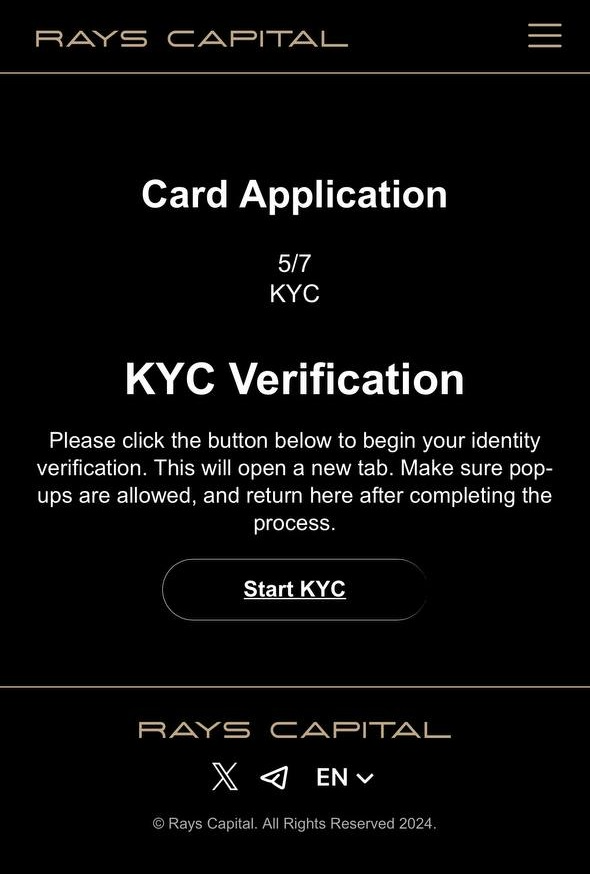
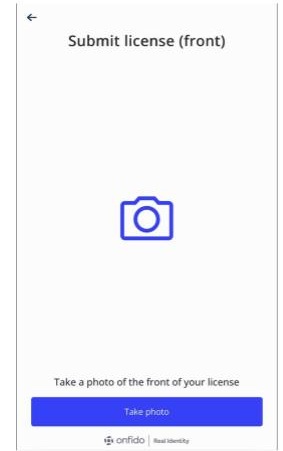
Step 5: Complete KYC Verification
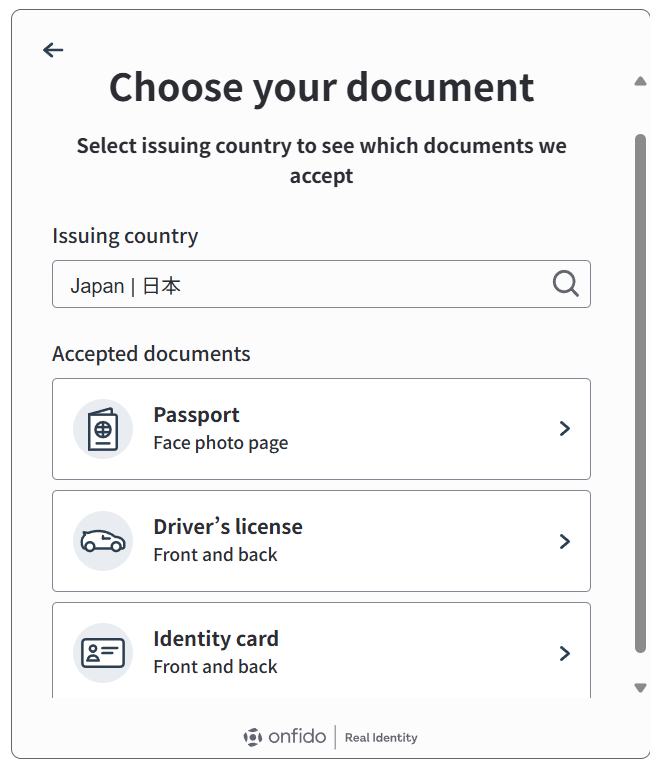
Tap “Start KYC”, then in the new window select “Start Verification.”
Follow the
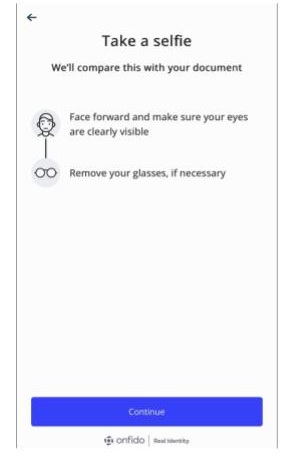
prompts to take and upload a selfie and photos of your ID’s front and back.

Be sure to select the same document type (e.g., passport, ID card, driver’s license) that you entered during Step 1.
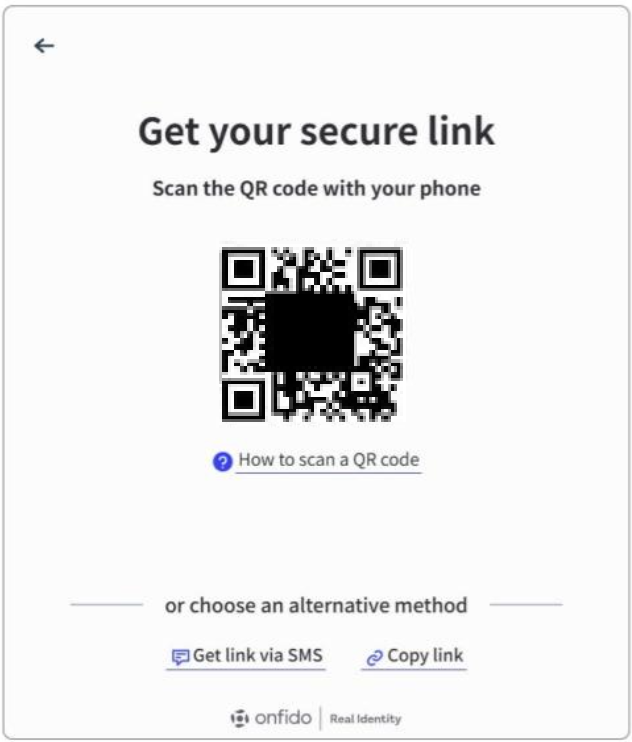
Scan the QR to kyc on phone
Take selfie and upload the ID
Passport is only front
ID will need front and back
Complete KYC

STEP 3 How to Pay the Card Issuance Fee
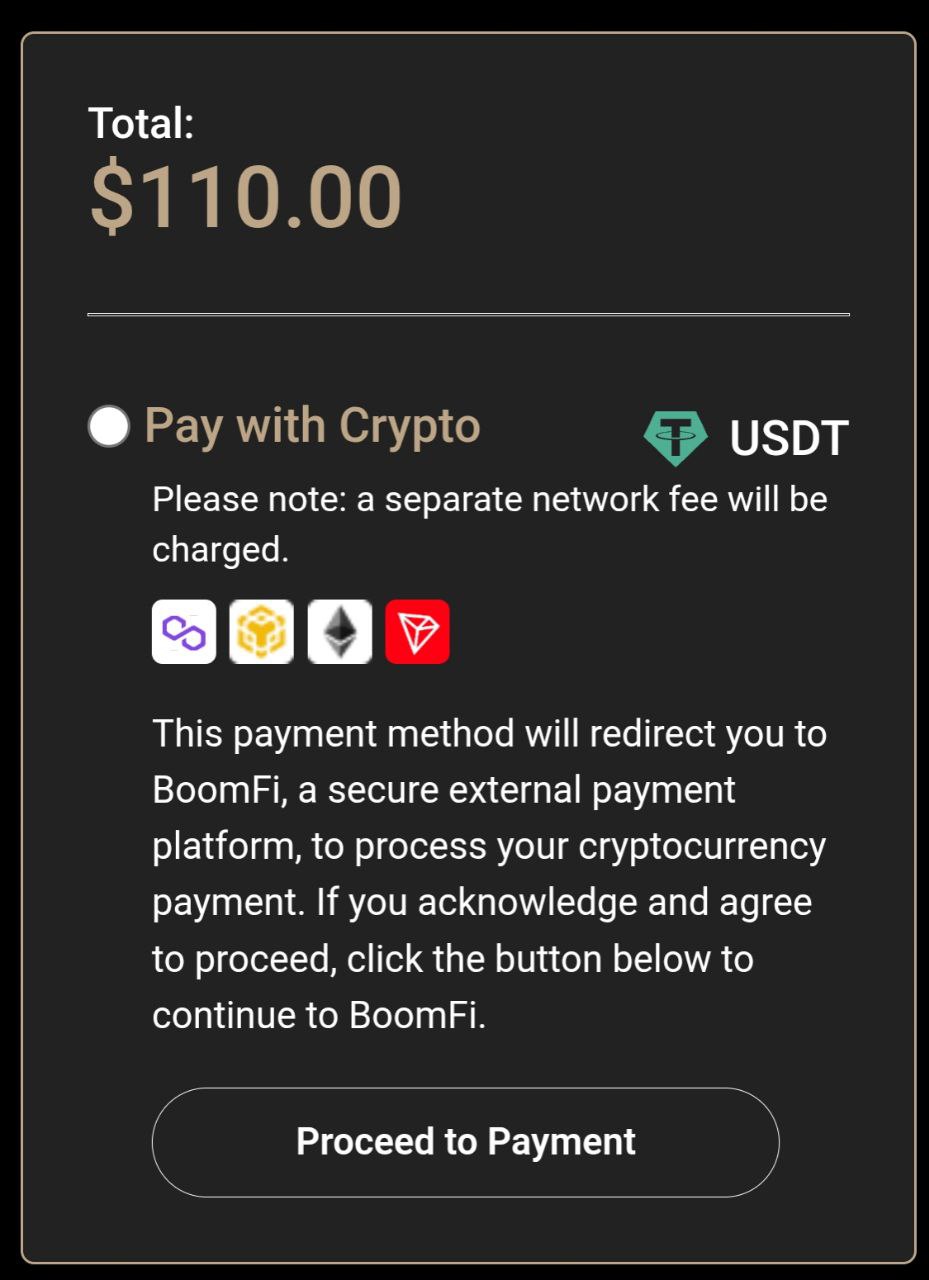
1)On the payment screen, check the box for “Pay with cryptocurrency.”
2)Tap “Proceed to Payment.”
Tip: If you accidentally close the page, log back into your card account, go to “Apply New Card”, and complete the payment process again.
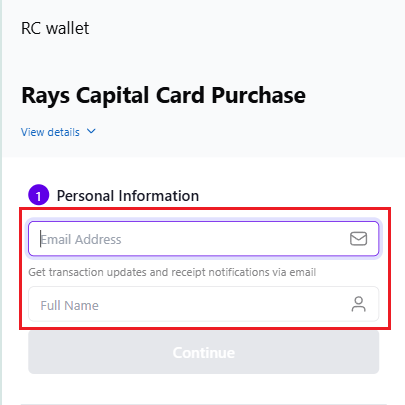
3)Fill in the Required Payment Information
① Personal Information
- Email Address: Enter your active email address.
- You will receive the payment receipt and transaction updates here.
- Full Name: Enter your full name exactly as it appears on your card application.
After confirming your input, tap “Continue” to proceed to the ② step.
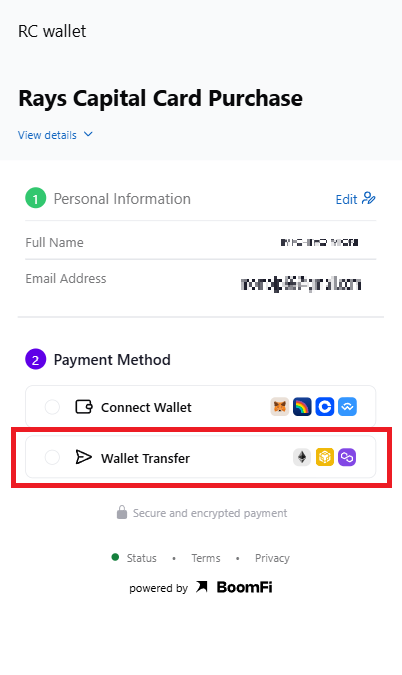
4)Select Your Payment Method
② Payment Method
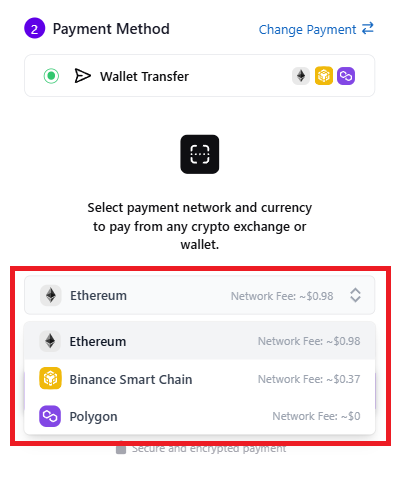
- Choose “Wallet Transfer” to pay from your existing RC Wallet balance.
5)Select Your Network
- Choose your preferred blockchain network (e.g., Ethereum, Tron, BSC, etc.).
- A network fee will be added to the payment amount—this varies depending on network congestion.
Example: Select Ethereum, then tap “Reveal Payment Details” to view the next step.

6)Review Payment Details
- Amount: Total amount including network fee.
- USDT Address: The BoomFi wallet address to which you will send the funds.
If copying info: Tap the copy icon next to the Amount and USDT Address to save them.
If sending immediately: Keep this screen open while you complete the transaction from RC Wallet.

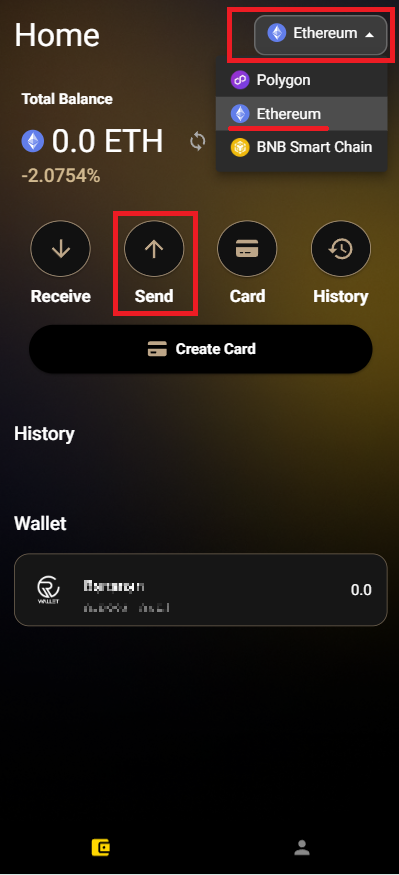
7)Send Funds from RC Wallet
- Open or log in to your RC Wallet.
- Select the same network (e.g., Ethereum) that you chose for payment.
- Tap “Send.”
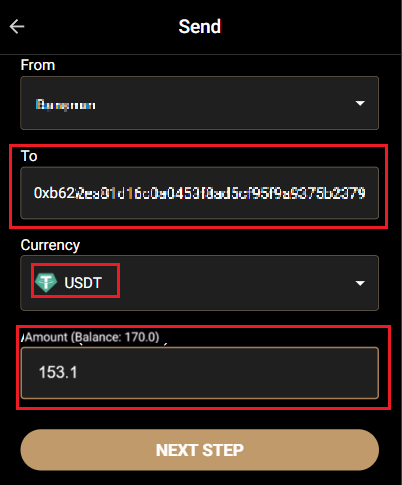
8)Enter Transfer Details
- To: Paste the BoomFi USDT address copied from Step 5).
- Currency: Select USDT.
- Amount: Paste the exact amount from Step 5).
After verifying the details, tap “NEXT.”
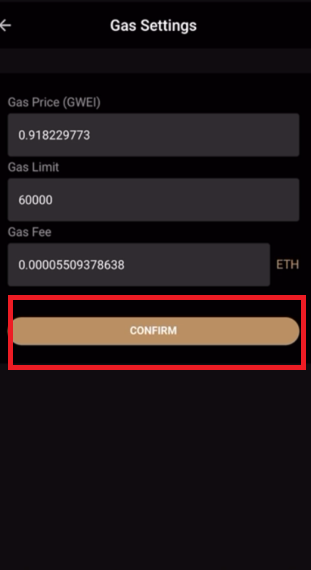
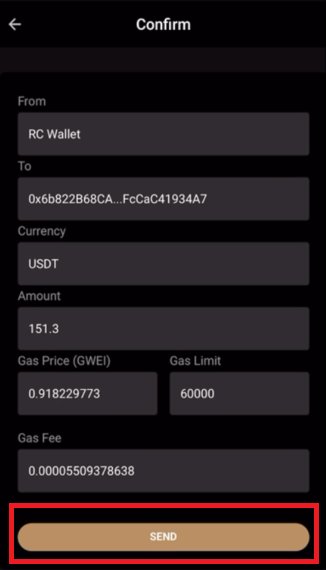
9)Check Gas Fee Settings
- Review the estimated Gas Fee.
- Tap “CONFIRM” to proceed.
10)Final Confirmation & Send
- Double-check all transaction details.
- Tap “SEND” to complete the transfer.
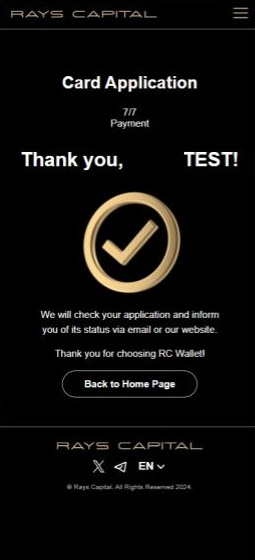
11)Payment Complete!
Once the transaction is complete, tap “Back to Home Page” to return to the RC Wallet HP.
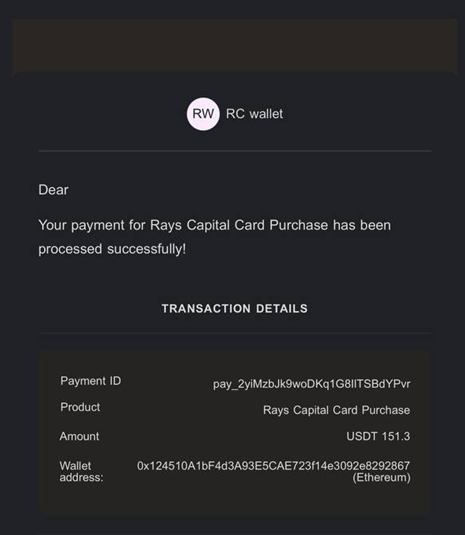
12)Email Confirmation from BoomFi
- You will receive a confirmation email from BoomFi.
- Sender: BoomFi
- Subject: RC Wallet Payment Succeeded
If you don’t see the email in your inbox, check your Spam or Junk Mail folder.
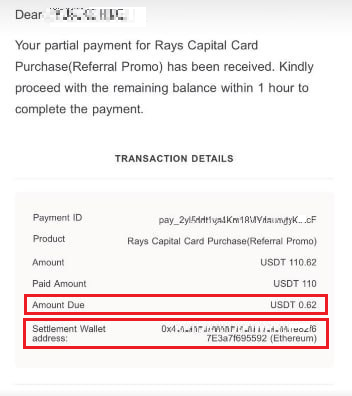
[Important] If Payment Is Incomplete
If the amount you sent is insufficient, you will receive another email from BoomFi.
- It will contain the outstanding amount (Amount Due) and the Settlement Wallet Address.
- Please send the remaining amount within 1 hour to complete your payment.
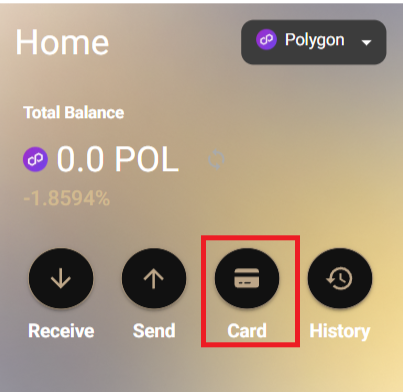
STEP 4 How to Activate Your Card
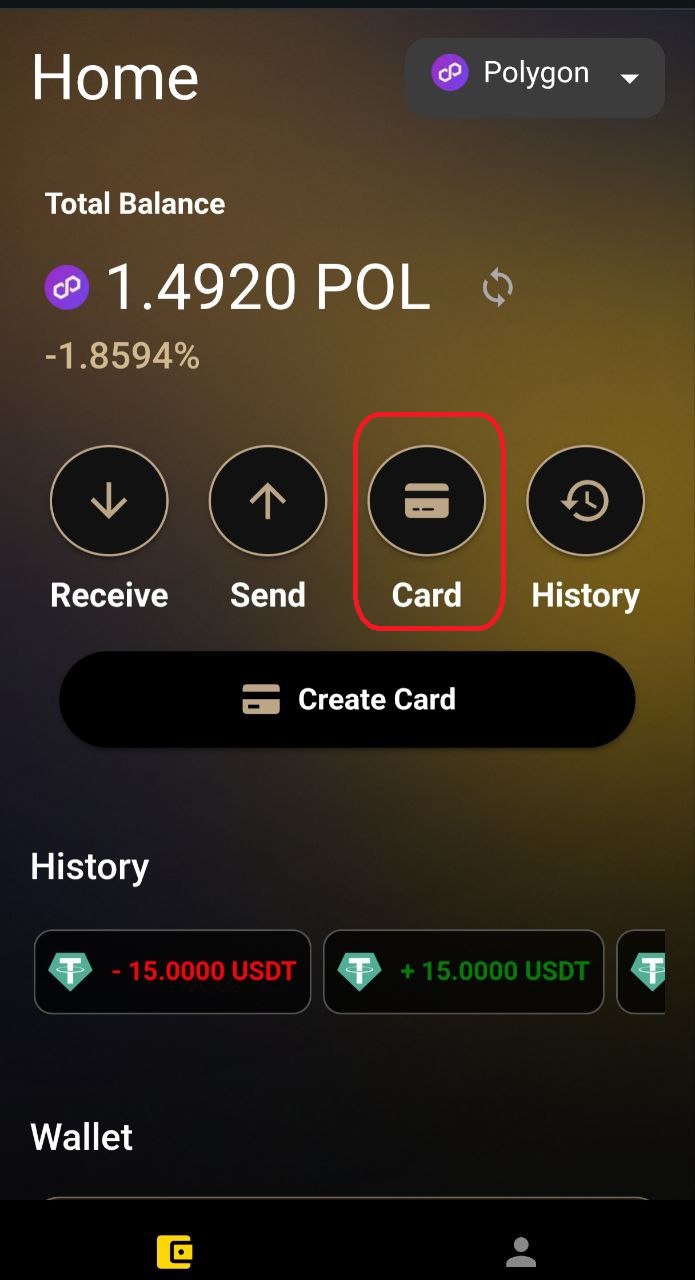
How to activate1) Log In to the Card Page
From the RC Wallet home screen, tap the “CARD” icon to access your card account.
Important: Use the same login credentials that you used when applying for your card.
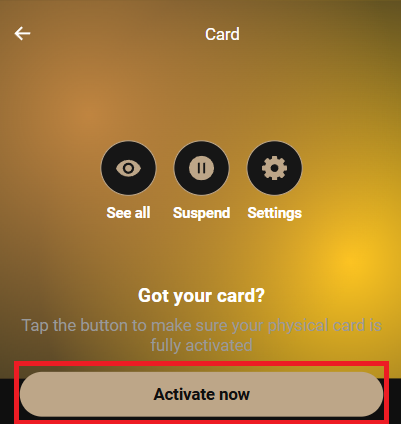
2) Begin Activation
On the card account page, tap “ACTIVATE NOW.”
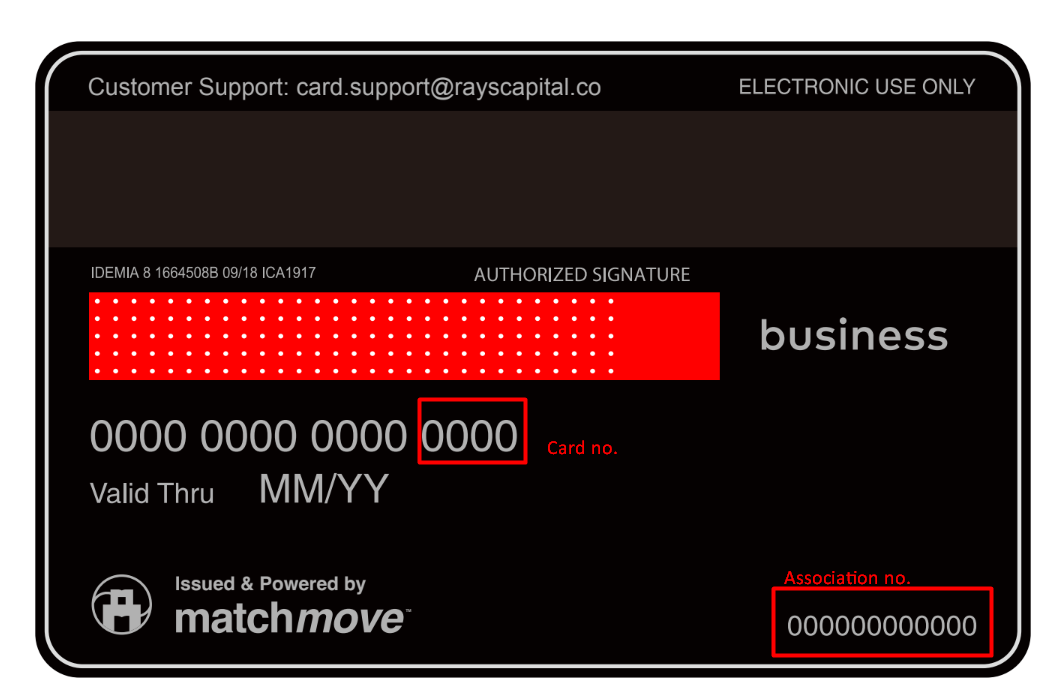
Enter the last 4 digits of your card number, along with the 12-digit Association Number printed on the lower right corner on the back of your card.
Then tap “CONFIRM.”
3) Set Your PIN Code
Create a secure 4-digit PIN code for your card. Choose something difficult to guess.
Important: The PIN setup process may take a few minutes.
Do not close the window during this process.
If it takes longer than 5 minutes, please contact our support team at:
📧 support@rayscapital.co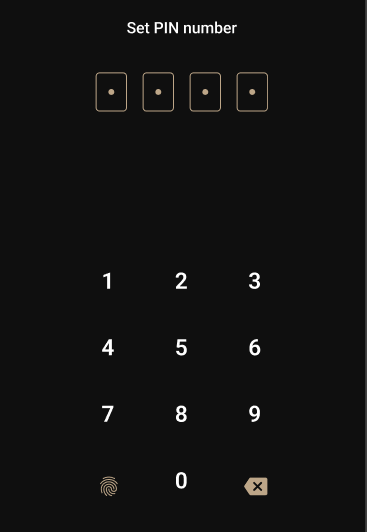
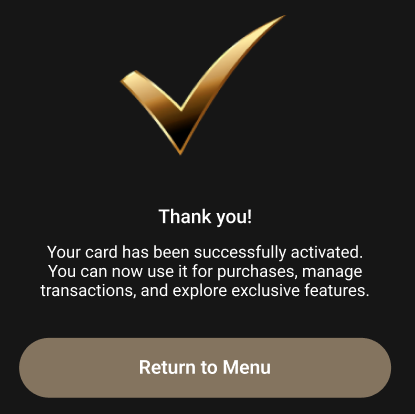
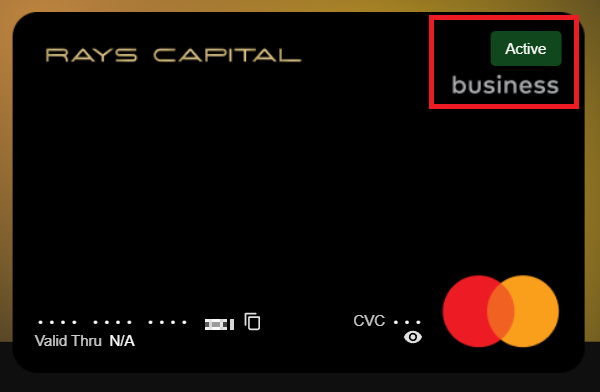
4) Activation Complete!
Once your card has been successfully activated, you’ll see a label that says “Active” in the top-right corner of the card screen.
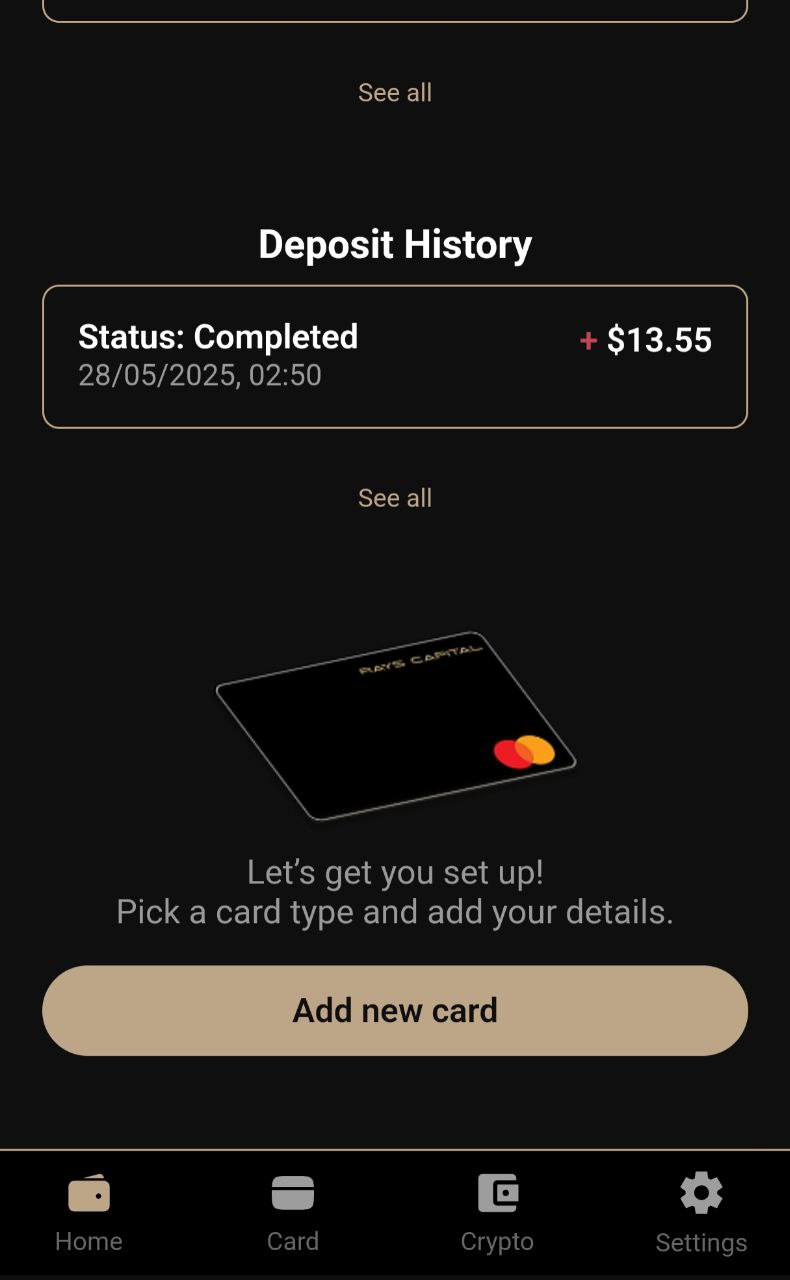
STEP 5 How to Deposit to Your Card
Before depositing to your Rays Capital Card, please make sure your RC Wallet has enough USDT balance and gas fees available.
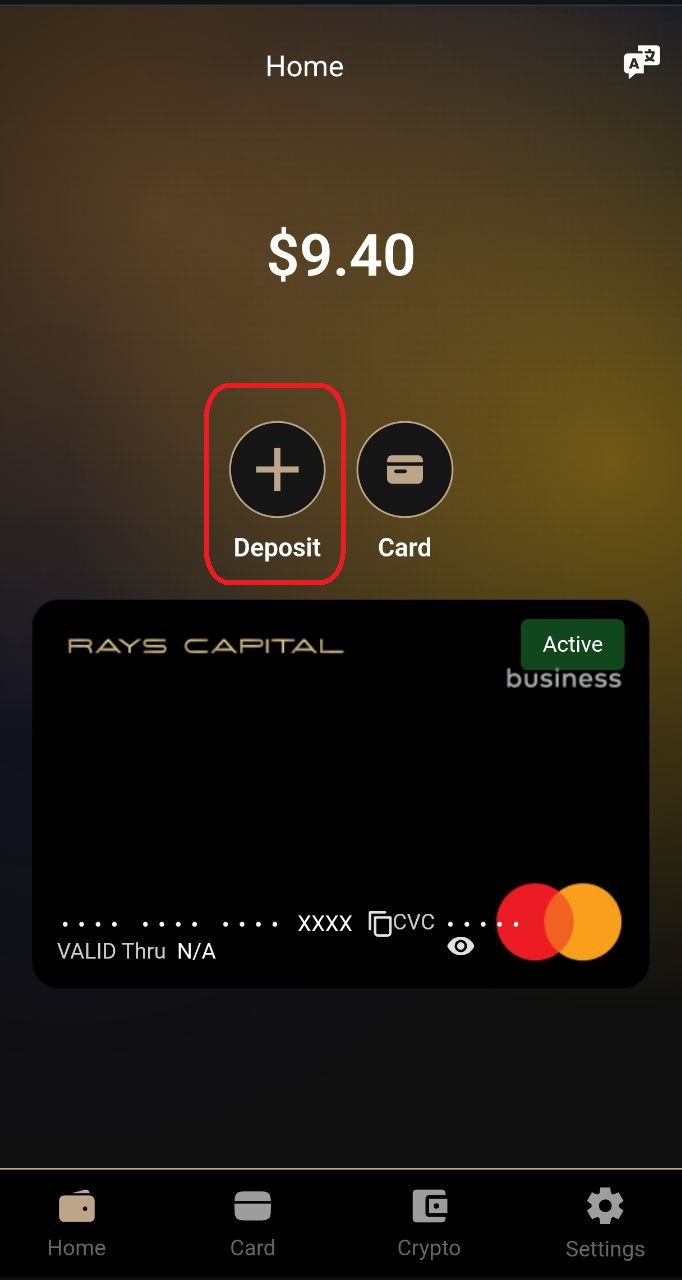
1) Log in to Your Card Account
On the RC Wallet home screen, tap the “CARD” icon to sign in to your card account.
The same login credentials you used when applying for the card.
For more details on how to use RC Wallet, please refer to the official user guide.
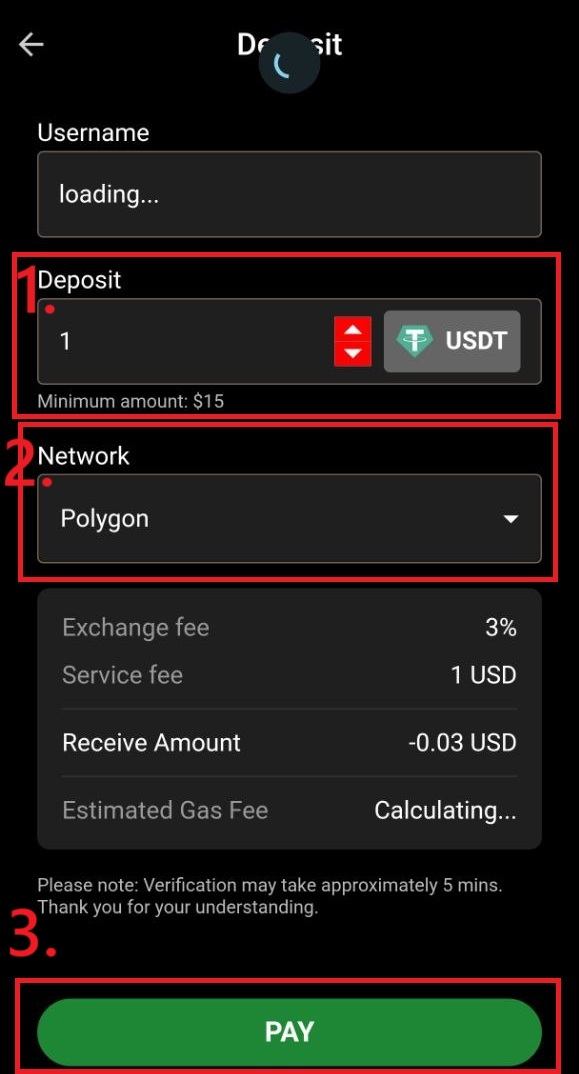
2) Tap “Deposit”
Once logged in, tap the “Deposit” button shown on the screen.
3) Enter Deposit Details
You will be prompted to complete three steps:
- Deposit Amount – Enter the amount you want to top up.
- Minimum deposit: $15 USD
- Select Network – Choose the blockchain network you want to use (e.g., Ethereum, Tron, BSC).
- Tap “PAY” to proceed.
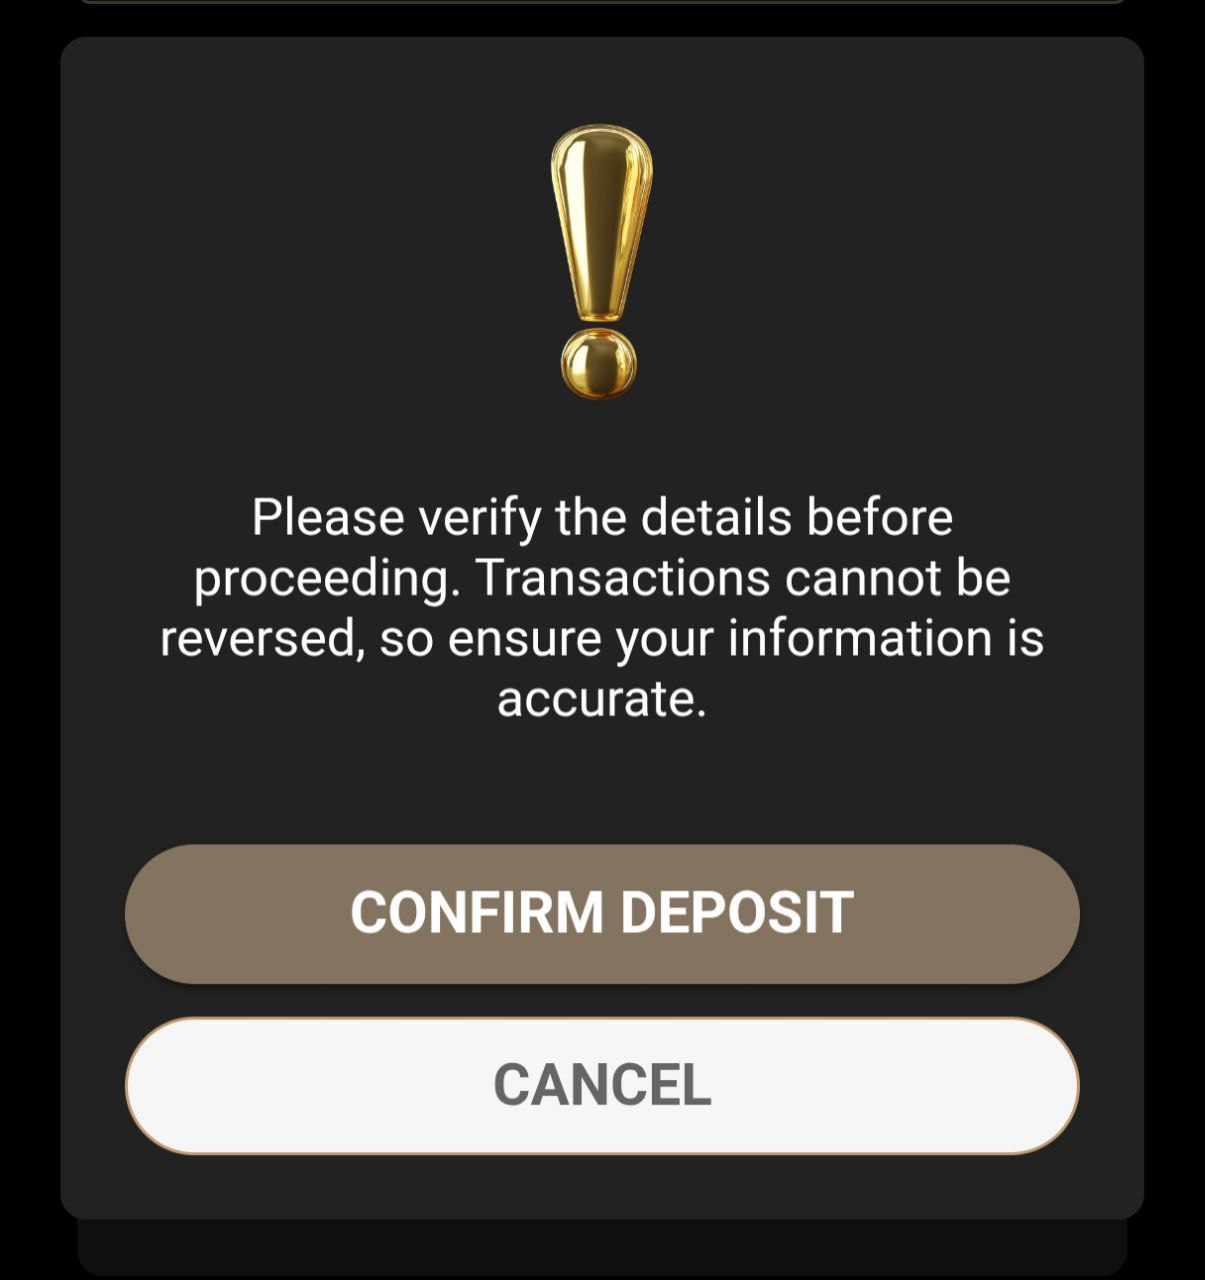
4) Confirm Deposit
A confirmation popup will appear.
- Review all the details carefully.
- Tap “CONFIRM DEPOSIT” to proceed.
- If you want to edit the amount or cancel, tap “CANCEL.”
Deposit Complete!
Once the deposit is successfully processed, the balance will be reflected on your card.
Let me know if you'd like to continue to STEP 6: How to Use the Card, or want this in a printable format!